Getting started in learning Python for Data Science, Software Engineering or some fun, nifty weekend project will all require one essential step, which is to install the proper and necessary tools for your projects.
In this tutorial, we will go over the steps necessary to install Python in the Windows 10 operating system and configure it so you can install any free, open-source package from the python install package manager called PIP. The name PIP is actually a recursive acronym standing for “pip installs packages”.
We will also install our packages within a construct called a Virtual Environment so that you can have a different set of packages for each project you develop. This will help if you have different package version requirements for each app you might create.
In this guide, we will:
- Install the latest version of Python
- Install the latest version of Pip
- Install the latest version of virtualenv
- Install the helper package virtualenvwrapper-win
- Create a virtual environment
- List the virtual environments defined
- Create a python project in a virtual environment
- List all installed packages in a virtual environment
- Add packages to a virtual environment
- Upgrade a package in a virtual environment
- Exit a virtual environment
- Re-activate and work on a project in a virtual environment
Install the latest version of Python
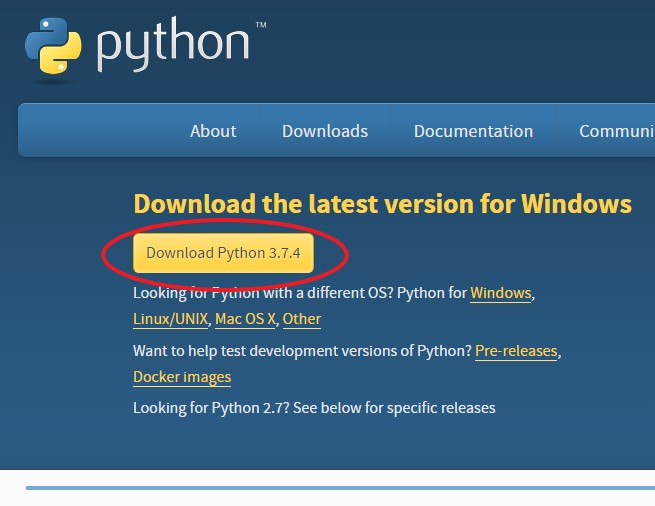
Now, as of this writing, there are two major versions of Python, which are popular. We won’t get into the reasons for this, but this tutorial will be working with Python version 3.7.X. The easiest way to install Python for Windows will be to download the MSI installer from the Python Downloads website by clicking here.
Unless you are on a very old computer chipset, you will need the 64-bit version shown here:
Next, after you download and start the executable you will want to select to “Add Python 3.7 to PATH”. This will allow you to use the “python” command from your command prompt from any directory.
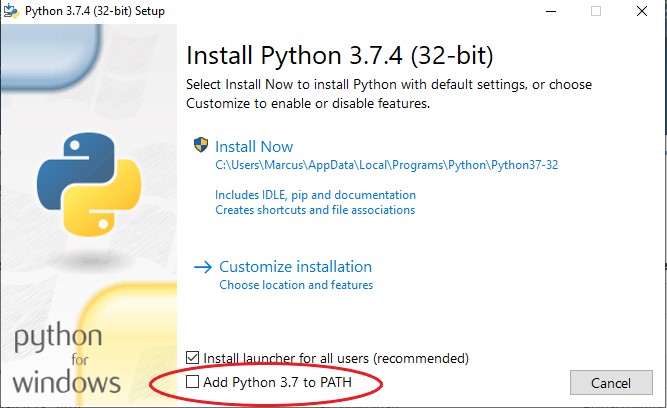
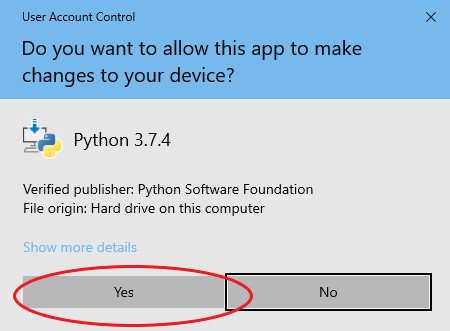
Then, click “Install Now” and if you get the User Access Control (depending on your settings) screen, select “Yes”
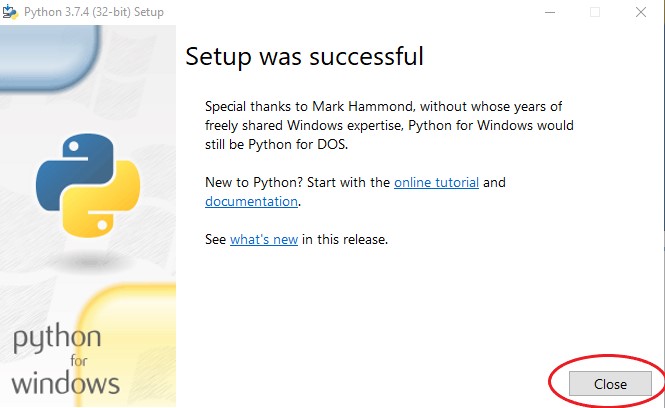
After a few minutes, the installation should finish and you will see this screen:
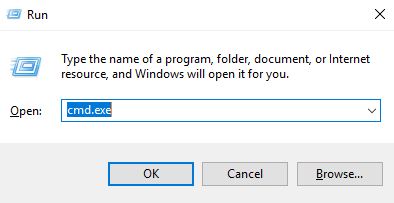
Now, you can confirm that Python is usable by opening Command Prompt. Type “Windows Key (⊞) + R” and then type in “cmd.exe” shown here:
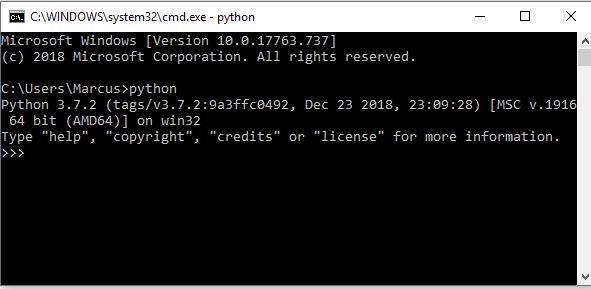
Type “Enter” and then you will see the command prompt window open. To verify that Python has been installed, just type in “python” on the command line. You should see the Python terminal open after that, as shown here:
Install the latest version of Pip
The Python package manager Pip, provides access to packages using the Python Package Index, also called PyPI, as well as other indexes. Some packages in Data Science might be custom and you will not find them through using Pip.
One such very useful package repository that is outside of Pip is from the University of California at Irvine from a researcher named Christoph Gohlke. These are wheel files, which are pre-built distribution files, and they require manual download and installation by running the command:
pip install C:/some-dir/some-file.whl
Lucky for us, when you install Python using the executable that we downloaded, it comes preinstalled with Pip.
If you wish to upgrade or downgrade Pip or change versions of Pip, please refer to our guide here.
To see all the installed packages in Pip, type:
pip list
If you need further help you can type:
pip help
The best practice for using Pip is to upgrade it before you install any new package. I will also take that a step further and follow the official Python package installation guide and use the following command before ANY package is downloaded and installed with Pip:
python -m pip install --upgrade pip setuptools wheel
Install the latest version of virtualenv
Now that we have Python and Pip installed, we will download our first package with Pip, which will let us create virtual environments that can contain all the packages we wish to use for a Python project.
It’s very easy to do with this command:
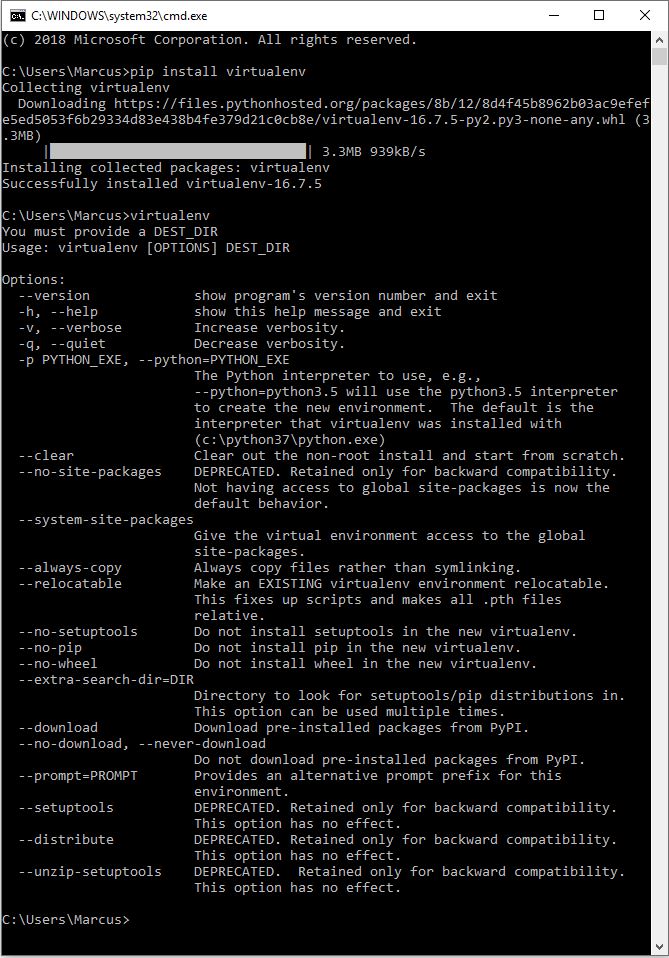
pip install virtualenv
After installation, you will be able to type the command virtualenv and see this:
Install the helper package virtualenvwrapper-win
Since we are working in Windows, we are going to install a very useful package called virtualenvwrapper-win which allows creating, using and deleting virtual environments much easier in Windows. It is especially useful when you start working on more than one Python project at a time, but you aren’t placing them inside their own Docker containers. This is the windows package equivalent of the very useful virtualenvwrapper which is built for use in the Linux Operating system.
Simply install with:
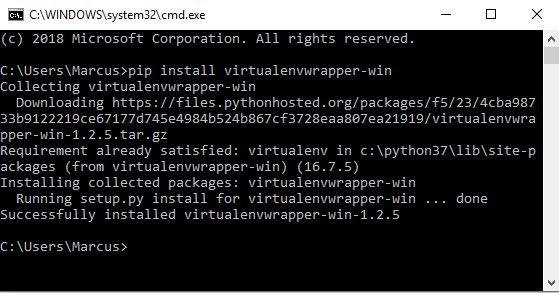
pip install virtualenvwrapper-win
A successful install should look like this:
We won’t worry about testing this package until we create a virtual environment in the next steps.
Create a virtual environment
Let’s create our first virtual environment by opening the command prompt again with “Windows Key (⊞) + R” and then type in “cmd.exe” as we did before. Then we will type in:
mkvirtualenv hello_world
After some time, you will see this in the command prompt:
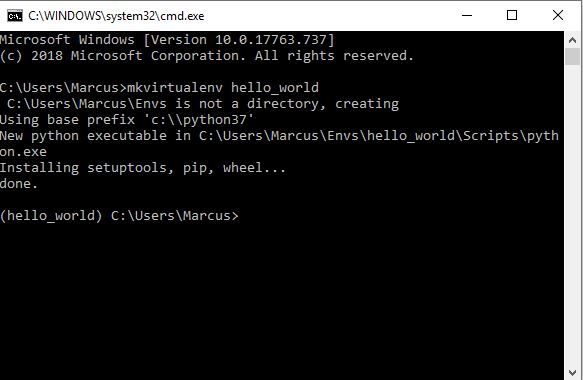
We are automatically placed inside the virtual environment and can begin to work on the project.
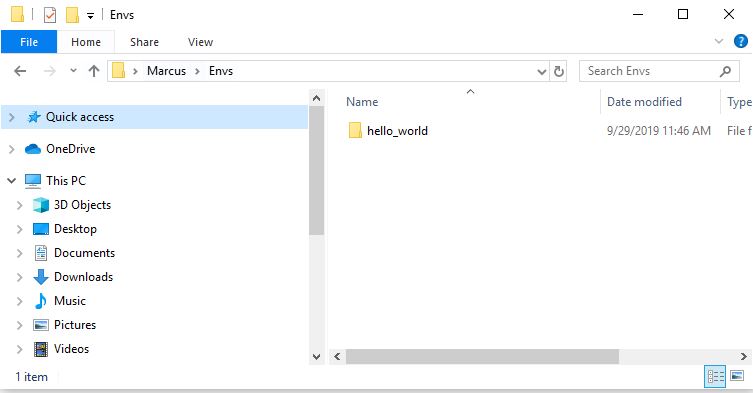
This also created a virtual environments directory called “Envs” inside the current directory. We can see it here:
List the virtual environments defined
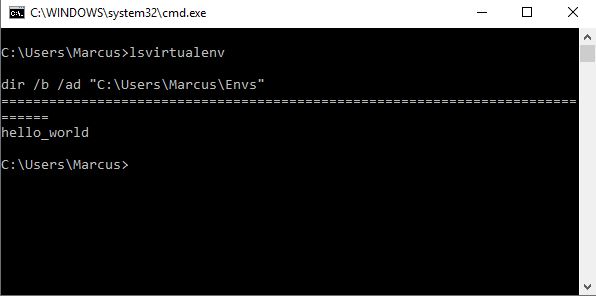
Using the virtualenvwrapper-win package that we installed in a previous step, we can list the created virtual environments that are within the “Envs” default folder after you install the virtualenv package. Let’s open back the command prompt with the command “Windows Key (⊞) + R” and then type in “cmd.exe” once again and type:
lsvirtualenv
This should show an output like this:
Create a python project in a virtual environment
Once you have multiple virtual environments created, each with a unique set of package installations, there is another command that will list these for you. We can easily activate and see any of our created virtual environments within the “Envs” folder with a command supplied by the virutalenvwrapper-win, which was installed in a previous step, by typing:
workon
This will show you the same output as lsvirtualenv as shown:

So, we will enter our hello_world project and then create our first project within it with the following commands:
workon hello_world
And then, we will create a directory for our project within our root user folder:
mkdir hello_world_project
Then we will enter the directory and connect or bind the project directory with the virtual environment with the commands:
cd hello_world_project
setprojectdir .
The commands should show the following output:
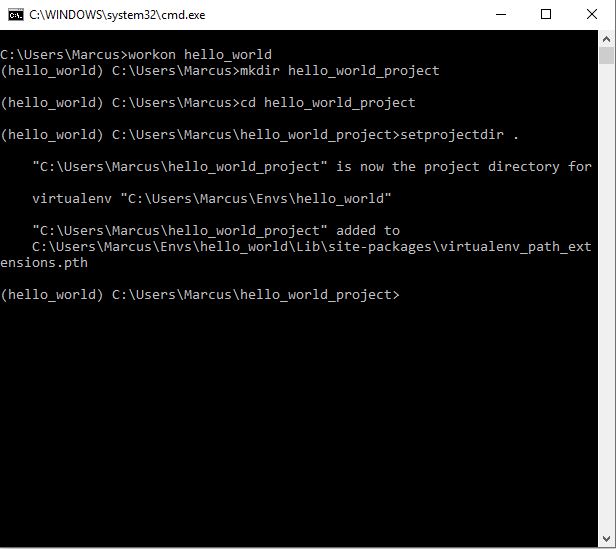
Conveniently, next time you enter this environment you will move to this directory automatically.
List all installed packages in a virtual environment
When you are in a virtual environment, there are two useful commands to see which packages are installed. One way is to list the packages which were installed with the pip command and are under the management of pip and another command which will list all of the packages within the virtual environment itself, also called the site-packages.
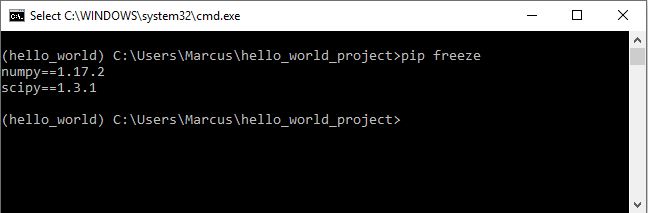
The first command is:
pip freeze
It will list all the pip installed packages and their versions and should have an output similar to:
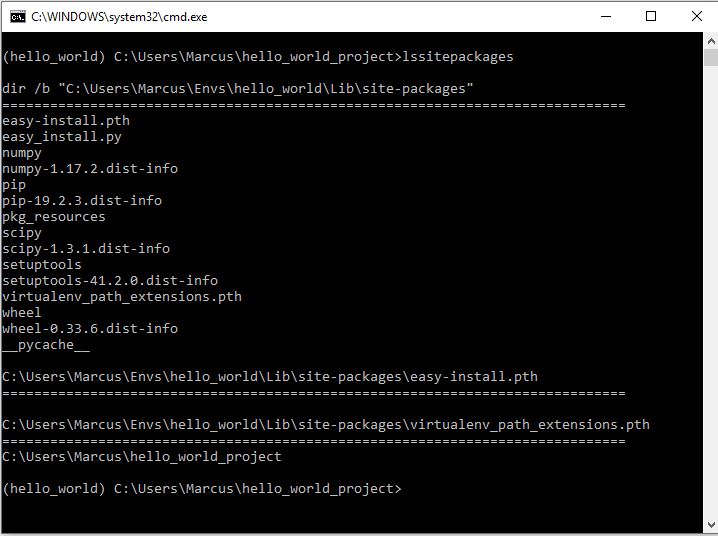
Next, you can see all the packages installed in a virtual environment with the command
lssitepackages
This will list all of the packages that are manually built or are a part of the default python build. It will give you a more comprehensive list of all packages installed within your python ecosystem, like this:
Add packages to a virtual environment
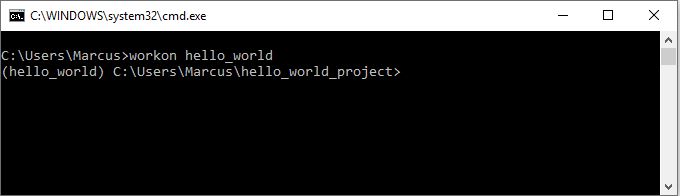
To enter the hello_world project within our setup virtual environment easily, we can easily use the workon command from the virtualenvwrapper-win package that we installed in a previous section. This will place us within our project directory and the virtual environment we created to house the project at the same time. If you get a message that says: “You should consider upgrading via the ‘python -m pip install –upgrade pip’ command.” Then please use the easy to follow guide to upgrade pip here.
The command we want to run is:
workon hello_world
This will output something like this:
Now, you can easily add packages inside your virtual environment that will not be accessible outside of the virtual environment. We can add packages in a few different ways.
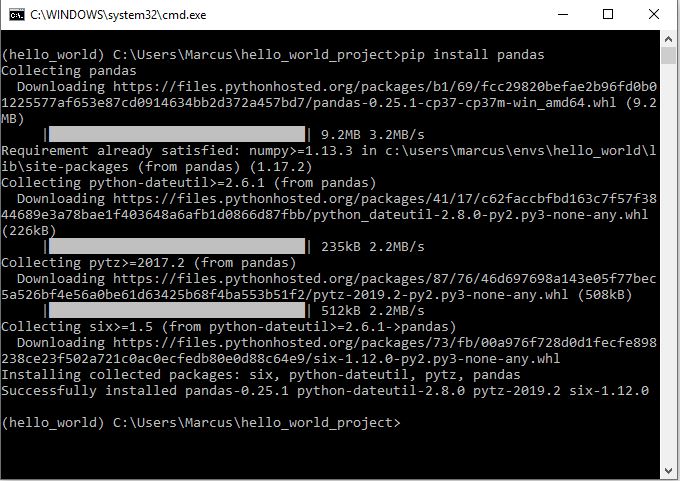
The first way is to use package manager pip as we did before. Shown below is the installation of the pandas package:
In order to install a specific version using the command:
pip install <package>==<version>
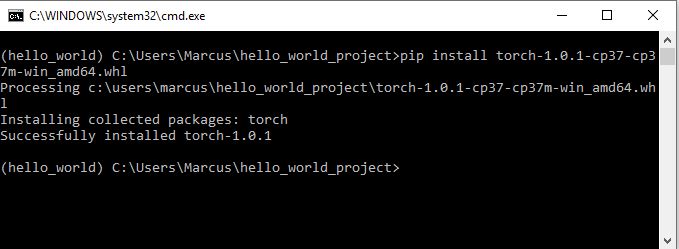
To install a package from source, such as one we might download from the Python Extension Packages library from UC Irvine, we would download and go to the directory of the source and type:
pip install .
Pip will take care of the rest for you as shown here:
Upgrade a package in a virtual environment
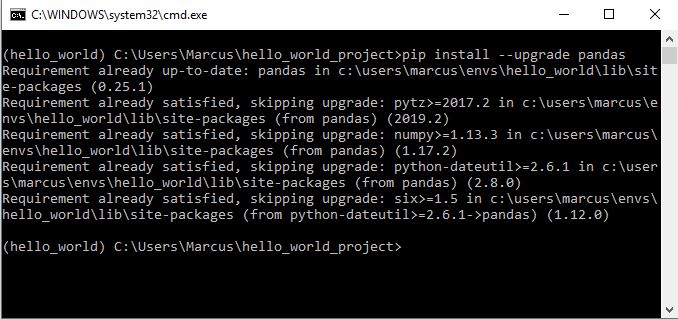
This is a very easy step. If we want to upgrade a package, simply use the –upgrade flag with the install flag and type in the name of the package you want to install, as shown here:
pip install --upgrade <package>
Exit a virtual environment
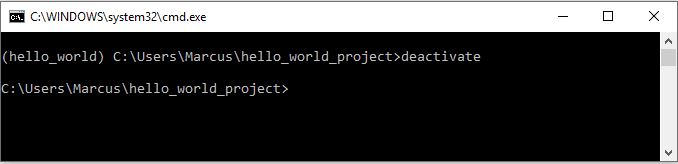
In order to exit the virtual environment we are in, we actually must deactivate it. This can be done with one simple command, shown here:
deactivate
You should get the following output:
Re-activate and work on a project in a virtual environment
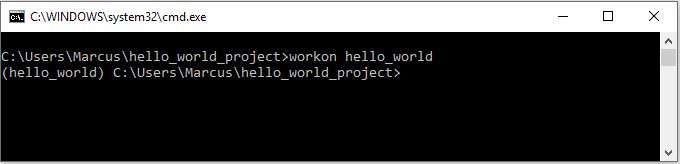
It is very easy to re-enter our project and virtual environment as we did before with the command:
workon
Here is an example output of what should be shown:
Conclusion
This guide should be all that you need for building any project and separating it from interference from other projects.
Please leave any comments with questions, errors, or additions you think it should include. Thank you for reading.
Recent Comments